
Discover the magic of do-it-yourself solutions with our comprehensive guide on DIY Furniture Stain Removal Hacks. This blog post provides valuable insights on effective and affordable methods to get rid of those stubborn stains on your favorite furniture. From natural remedies to chemical mixtures, we cover all the bases.
1. 'The Best Offense is a Good Defense': Preventing Stains on Your Furniture
When it comes to furniture stains, prevention is key. Taking proactive measures to protect your furniture can save you time, money, and the hassle of dealing with stubborn stains. One of the simplest ways to prevent stains is by using furniture covers or slipcovers. These protective layers act as a barrier between your furniture and potential spills or accidents, making clean-up much easier. Additionally, consider investing in stain-resistant fabrics or treating your furniture with a fabric protector spray. These products can help repel liquids and prevent stains from setting in.
Another important aspect of stain prevention is establishing some ground rules for using your furniture. For example, it's a good idea to enforce a "no food or drinks on the couch" policy. Encourage family members and guests to use designated eating areas to minimize the risk of accidental spills. If you have young children or pets, consider creating a designated play area away from your furniture to avoid any mishaps.
Regular cleaning and maintenance also play a crucial role in preventing stains. Vacuuming your furniture regularly can help remove any dirt or debris that could potentially cause stains. For upholstered furniture, consider using a fabric cleaner that is specifically designed to remove stains without damaging the material. Additionally, promptly addressing any spills or accidents is important. Blotting the stain with a clean cloth or paper towel can help absorb the liquid before it seeps into the fabric and becomes more difficult to remove.
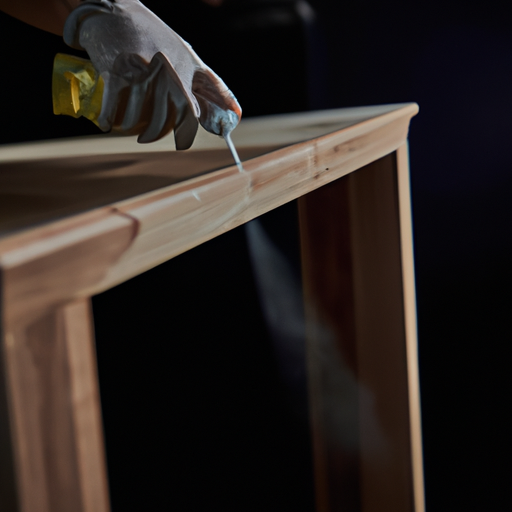
1. Image showing a person applying a protective coating on a wooden furniture piece
2. 'Wine Not?' – Tackling Red Wine Stains
Red wine stains can be a nightmare to deal with, but fear not! There are several DIY hacks that can help you tackle these stubborn stains. The key to successfully removing red wine stains is to act quickly. As soon as the spill occurs, grab a clean cloth or paper towel and gently blot the area to absorb as much of the wine as possible. Avoid rubbing the stain, as this can cause it to spread and set deeper into the fabric.
Once you've blotted up the excess wine, it's time to tackle the stain itself. One effective method is to create a mixture of equal parts hydrogen peroxide and dish soap. Apply this mixture to the stain and let it sit for a few minutes. Then, using a clean cloth or sponge, gently blot the stain until it starts to fade. Rinse the area with water and repeat the process if necessary.
Another popular DIY solution for red wine stains is using white vinegar and baking soda. Begin by sprinkling baking soda directly onto the stain, making sure to cover it completely. Then, pour white vinegar over the baking soda until it starts to fizz. Allow the mixture to sit for a few minutes before blotting it with a clean cloth. Rinse the area with water afterward to remove any residue.
3. Can You Really Say Goodbye to Ink Stains?
Ink stains can be a real headache, especially when they find their way onto your furniture. But don't worry, there are DIY methods that can help you bid farewell to those pesky ink stains. Just like with red wine stains, the key is to act quickly. As soon as you notice the ink stain, grab a clean cloth and blot the area gently to remove any excess ink.
One popular method for removing ink stains is to use rubbing alcohol. Moisten a cotton ball or a clean cloth with rubbing alcohol and dab it onto the stain. Be careful not to rub too vigorously, as this can spread the ink further. Continue blotting until the ink starts to lift. Rinse the area with water and repeat the process if necessary. This method is effective for many types of ink stains, but it's important to test it on a small, inconspicuous area first to ensure it doesn't damage the fabric.
Another DIY solution for ink stains is to use a mixture of milk and cornstarch. Create a paste by mixing equal parts milk and cornstarch until it forms a thick consistency. Apply the paste to the ink stain and let it sit for about an hour. The milk and cornstarch mixture helps to break down the ink, making it easier to remove. After an hour, gently wipe away the paste with a clean cloth and rinse the area with water.

3. Illustration demonstrating the steps to remove an ink stain from a fabric couch
4. 'The Proof of the Pudding is in the Eating' – Testing Commercial Stain Removers
When it comes to stubborn furniture stains, sometimes DIY methods may not be enough. That's when commercial stain removers come into play. These products are specifically formulated to tackle tough stains and can be a convenient option for those looking for a quick and effective solution. However, with so many options available on the market, it can be overwhelming to choose the right one.
To determine the effectiveness of commercial stain removers, it is important to put them to the test. One effective way to do this is by selecting a variety of common stains, such as coffee, grease, or pet stains, and applying them to a piece of fabric or furniture. Follow the instructions provided on the stain remover and apply it to each stain individually. Allow the product to work its magic for the recommended time and then rinse or wipe away the residue.
During the testing process, pay attention to factors such as the ease of application, the smell of the product, and the effectiveness in removing the stain. Some stain removers may require multiple applications or longer soaking time to completely eliminate the stain. It's also important to consider the type of fabric or material the stain remover is suitable for, as some products may be too harsh for delicate fabrics.
Additionally, don't forget to check for any potential damage or discoloration caused by the stain remover. While the main goal is to remove the stain, it is equally important to ensure that the product does not cause any harm to your furniture or fabric.
DIY Furniture Stain Removal Hacks:
| Stain Type | Natural Remedy | Chemical Mixture | Additional Tips |
|---|---|---|---|
| Coffee | Baking Soda & Vinegar | Mild Detergent & Water | Use a soft cloth to apply the mixture |
| Wine | White Wine & Liquid Soap | Ammonia & White Vinegar | Let the mixture sit for 5 minutes |
| Grass | Olive Oil & Lemon Juice | Glycerin & Soap | Rinse the area after scrubbing |
| Paint | Dish Soap & Hydrogen Peroxide | Acetone & Rubbing Alcohol | Test the mixture on a hidden area first |
In conclusion, there's no need to panic or spend a fortune on professional cleaning services when you encounter a furniture stain. With these DIY furniture stain removal hacks, you can keep your furniture looking as good as new. Remember, the key to successful stain removal is to act fast and use the right method for the type of stain you're dealing with.