
Ever feel overwhelmed by your messy kitchen? In this guide, we will reveal the secrets of cleaning your kitchen in just 15 minutes. We'll walk you through a step-by-step process that will make your kitchen sparkle without spending hours scrubbing and cleaning.
1. 'The 5-minute declutter: Is it necessary?'
We all know that a cluttered kitchen can be overwhelming and make it difficult to clean efficiently. That's why the first step in cleaning your kitchen in just 15 minutes is to declutter in 5 minutes. But is it really necessary? Absolutely! Decluttering not only creates a clean and organized space, but it also saves you time in the long run. By taking just a few minutes to put away dishes, clear countertops, and organize utensils, you'll have a clear workspace to tackle the rest of your cleaning tasks. Plus, you'll be amazed at how much faster and easier it is to clean when everything is in its proper place. So, before you start your 15-minute kitchen cleaning sprint, take a few moments to declutter and set yourself up for success.
In those precious 5 minutes, focus on clearing away any dishes or utensils that may be cluttering your countertops. Put away any items that don't belong in the kitchen and find a designated spot for frequently used tools and appliances. Use storage solutions like drawer dividers or hanging racks to maximize your space and keep things organized. Remember, the goal is to create a clean and clutter-free environment that will make your 15-minute cleaning session a breeze.

1. Image showing a cluttered kitchen counter before the decluttering process.
2. 'Mastering the Art of Speed Cleaning: How?'
Speed cleaning may seem like an impossible feat, but with a few strategies and techniques, you can become a master in no time. First, prioritize your tasks by focusing on the areas that will make the biggest impact. Start by wiping down surfaces, such as countertops and stovetops, with a multi-purpose cleaner. Use a microfiber cloth or disposable wipes for quick and efficient cleaning. Next, tackle the sink and dishes. Load any dirty dishes into the dishwasher or quickly hand wash them if necessary. Don't forget to wipe down the sink and faucet to remove any grime or water spots.
Now it's time to move on to the floors. Grab a broom or vacuum and quickly go over the high traffic areas to remove any crumbs or dirt. If you have hardwood or tile floors, consider using a spray mop or a damp microfiber mop for a more thorough clean. Finally, give your appliances a quick wipe-down. Use a damp cloth to remove any spills or fingerprints from the refrigerator, microwave, and oven. For stainless steel surfaces, a bit of glass cleaner or vinegar can help restore their shine.
To speed up your cleaning process, use efficient tools and products. Keep all your cleaning supplies in one easily accessible caddy or bucket, so you don't waste time searching for them. Invest in time-saving products like pre-moistened wipes or spray cleaners that cut through grease and grime quickly. Remember, the goal is to work smart, not hard.
3. 'Quick and Simple: Can cleaning solutions make a difference?'
Cleaning solutions play a vital role in making your kitchen cleaning quick and effective. With the right products, you can tackle tough stains, grease, and grime with ease. Look for multi-purpose cleaners that are specifically designed for kitchens and can be used on various surfaces. These solutions are formulated to cut through grease and remove stubborn dirt, saving you both time and effort.
When choosing cleaning solutions, opt for those that are environmentally friendly and non-toxic. This ensures the safety of your family and pets while still providing effective cleaning power. Many brands now offer eco-friendly options that are free from harsh chemicals, making them a great choice for a quick and simple cleaning routine.
In addition to multi-purpose cleaners, specialized solutions can make a significant difference in certain areas of your kitchen. For example, a degreaser can be incredibly useful for removing built-up grease on stovetops and range hoods. Oven cleaners can help eliminate baked-on food and grime inside your oven, saving you from scrubbing for hours. And don't forget about glass cleaners for shining up windows, mirrors, and glass surfaces.
To make your cleaning solutions work even more effectively, follow the instructions on the labels. Some may need to be left on the surface for a few minutes to allow the solution to penetrate and loosen dirt. Others may require dilution or a specific application method. By using the products correctly, you can maximize their cleaning power and achieve sparkling results in no time.
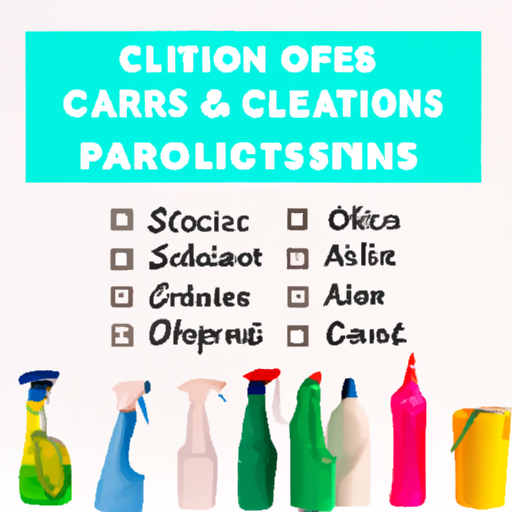
3. Photo of various cleaning solutions with their pros and cons indicated.
4. 'Time to Shine: Final Touches'
Now that the bulk of the cleaning is done, it's time to put the finishing touches on your kitchen to make it shine. Start by wiping down all the countertops, making sure to remove any lingering crumbs or spills. Use a gentle cleaner or a mixture of water and vinegar to avoid leaving streaks or residue.
Next, focus on the appliances. Give your refrigerator a quick wipe down, paying attention to the handles and any visible fingerprints or smudges. Use a stainless steel cleaner if necessary to bring back its shine. Don't forget to clean the inside of your microwave and oven, removing any food splatters or residue that may have built up.
Take a moment to clean your sink thoroughly. Use a scrub brush or sponge to remove any food particles or stains. If you notice any stubborn stains or mineral deposits, try using a mixture of baking soda and water or a lime and vinegar solution to eliminate them. Rinse the sink well and dry it with a clean cloth.
Now, it's time to tackle the floors. Sweep or vacuum the entire kitchen, paying special attention to corners and hard-to-reach areas. If you have tile or laminate flooring, mop it with a mild cleaner or a solution of warm water and vinegar. For hardwood floors, use a cleaner specifically designed for wood to maintain its shine and protect it from damage.
How To Clean Your Kitchen in 15 Minutes:
| Task | Time | Tools | Results |
|---|---|---|---|
| Wipe down countertops | 2 minutes | Dish soap, sponge, and paper towels | Clean countertops |
| Clean sink | 3 minutes | Dish soap, scrubber, and paper towels | Clean sink |
| Wipe down appliances | 2 minutes | Glass cleaner and paper towels | Shiney appliances |
| Sweep the floor | 3 minutes | Broom and dustpan | Clean floors |
And there you have it! A clean, sparkling kitchen in just 15 minutes. By following these simple steps, you can maintain a clean kitchen without spending hours on end. So why wait? Transform your kitchen now and revel in its pristine condition!